 Skip to content
 Hey there! Congrats on your recent purchase of the Echelon Reflect Touch! My name is Sam and I’m here to help you navigate this fantastic device. In this Echelon Reflect Navigation Guide, I’ll walk you through the steps to set up your reflect touch, connect to Wi-Fi, sign into the app, and select your preferred workout category. I’ll also show you how to add classes to your favorites, connect your heart rate monitor or Bluetooth headphones, adjust the volume, pause the video, and even delete a class. Additionally, I’ll guide you on exploring other features like switching users, checking for updates, adjusting settings, and accessing classes in ada mode. By the end of this tutorial, you’ll be a pro at navigating your Echelon Reflect Touch!
In the Echelon Reflect Navigation Tutorial video by Echelon Fit, I’ll provide a hands-on demonstration of the entire setup process and walk you through each step, allowing you to follow along easily and confidently. Whether you’re a beginner or an experienced fitness enthusiast, this tutorial will give you all the information you need to make the most of your Echelon Reflect Touch and enhance your workout experience. So, let’s get started and make navigating your Echelon Reflect Touch a breeze!
Echelon Reflect Navigation Guide

Turning on your reflect Touch
To turn on your reflect Touch, make sure it is plugged in and the switch underneath is turned on. Press and hold the echelon logo to turn your reflect on.
Connecting to Wi-Fi
To connect your reflect Touch to Wi-Fi, select your Wi-Fi network from the options provided and enter the password. Once entered, click connect to establish a connection.
Signing into the app
After turning on your reflect Touch and connecting to Wi-Fi, you will need to sign into the app. Enter your username and password to access your account. Tap the screen to start and select the family member who will be using the reflect.
Navigating the Categories page
The Categories page is where you can explore different class options. It includes your Favorites, welcome or intro classes, and all class types. Scroll through the categories and tap on the one you wish to take. You will see the next upcoming live class for that category. Every live class will also be added to the On Demand section for future viewing. To add a class to your Favorites, simply tap the star outline.

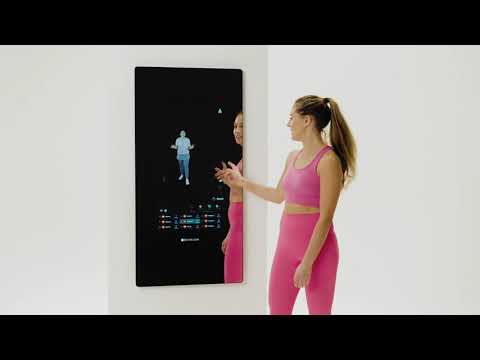
This image is property of i.ytimg.com.

Taking a live class
To take a live class, select the class you want to participate in from the Categories page. Read the class description to get more information about the class. During the class, you can compete on the leaderboard based on your heart rate. Make sure to connect your heart rate monitor to track your calories.
Adding classes to Favorites
If you want to save a class for future reference, you can add it to your Favorites. Simply tap the star outline next to the class. The latest classes will be indicated with a new label, making it easy to identify new additions to the class library.
Connecting heart rate monitor and Bluetooth headphones
To connect your heart rate monitor or Bluetooth headphones, put the device in pairing mode. Once in pairing mode, tap the relevant icon on the screen to connect your device. This will allow you to monitor your heart rate and listen to your class with Bluetooth headphones.
Playing and pausing a class
During a class, you can press play to start the video. Adjust the volume by tapping the volume button on the screen and using the plus or minus buttons. If you need to pause the video, simply tap on the screen and press pause. To exit the class, press the exit button.

Viewing upcoming live classes
To see all upcoming live classes, select the Live tab. Here, you can browse and filter classes by date and class type. This allows you to plan your workouts in advance and find classes that fit your schedule and interests.
Tracking progress and deleting classes
On the Progress tab, you can track your workout history and progress. View classes you’ve taken by week or by month, and see your total workouts, duration, and calories burned. Select any class you’ve taken to see your class rank, heart rate, and total calories burned. If you want to delete a class from your history, select the three dots next to the class and choose the delete option.
Adjusting settings on the reflect
The More tab allows you to adjust various settings on your reflect Touch. If you want to switch users, simply tap the switch user option and select a new member who wants to work out. You can also sign out from the More tab by tapping the sign out option. To check for any available updates, tap the check for an update button. Adjust the volume and brightness level to your preference, change Wi-Fi networks, set your time zone, and location. If needed, enable ADA settings by tapping the ADA settings option and toggling it on. Make sure to save any changes you make. When in ADA mode, guests can easily access classes by swiping down on the screen during a class, and the metrics and selection options will appear at the bottom of the screen.
And that’s it! With these simple instructions, you can navigate through and make the most out of your Echelon Reflect Touch. Enjoy your workouts and have fun achieving your fitness goals!


